Managing member requests in your Facebook group is essential in ensuring members are suitable to be in your group.
When new members request to join your group, you must be sure of their purpose and who they are, especially when your group is open to the public. Always remember to turn on notifications about new member requests.
Membership questions enable you to know more about new members; you can ask them up to three qualifying questions, such as their purpose for joining your group or how they can contribute to the group.
It might reach a stage where you receive numerous membership requests. At that time, using membership request filters could be helpful. With membership request filters, you can select and sort predefined filters to apply to pending requests.
Those requests can be accepted or declined in bulk or individually. Membership request filtering is a time-saving screening technique that helps in managing and prioritizing membership requests. You can select members whose purpose is aligned with your group’s purpose and decline those whose purpose is not.
When your purpose aligns, it will be easier for you to convert the members into customers. So you should consider your target members and customers when selecting new members. Not all requests or invitations are from the right people, so you must select or accept new members strategically.
In this article, you will know if members can see when you decline their request or invitation on your Facebook group. But first, let’s get started with some helpful information.
3 Ways to Invite Members to Your Facebook Group
Invite from Group
As a member or an admin of a group, you can invite your Facebook friend to join your group by selecting Invite from the group. The person you invited can preview the group and decide whether he wants to join.
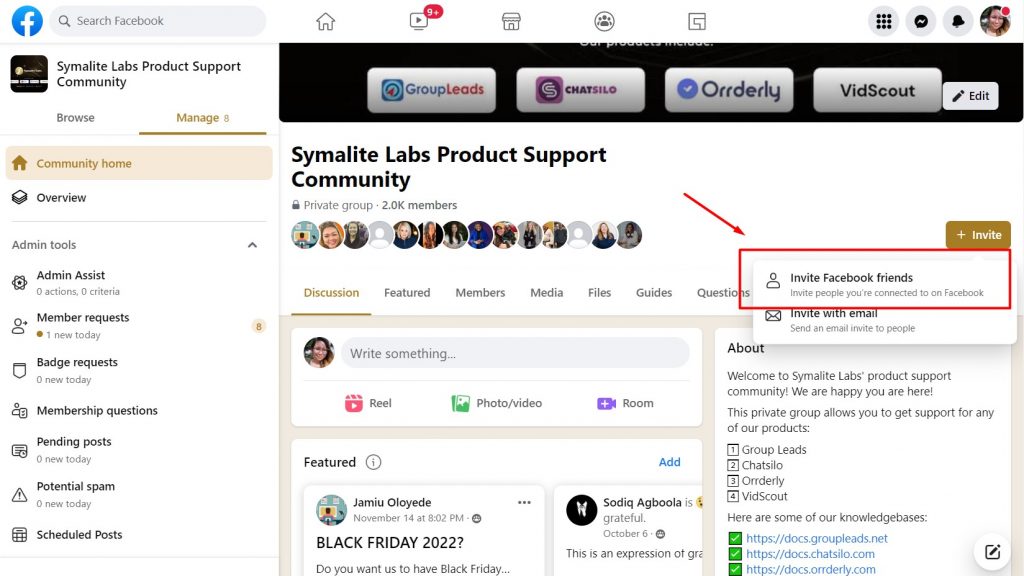
If he decides to join, the admin may have to approve before he is allowed to become a group member. Below are steps you can follow when inviting a friend to join your group.
1. Tap the three horizontal lines at the top right corner of Facebook, then tap Groups to select your group.
2. Select Invite below the group name. Names of your friends will be listed on the screen
3. Next to the names of friends you want to invite, tap Invite. To invite, you can also type a friend’s name in the search bar.
Invite with Email
This method is only available to admins; they can invite members through email.
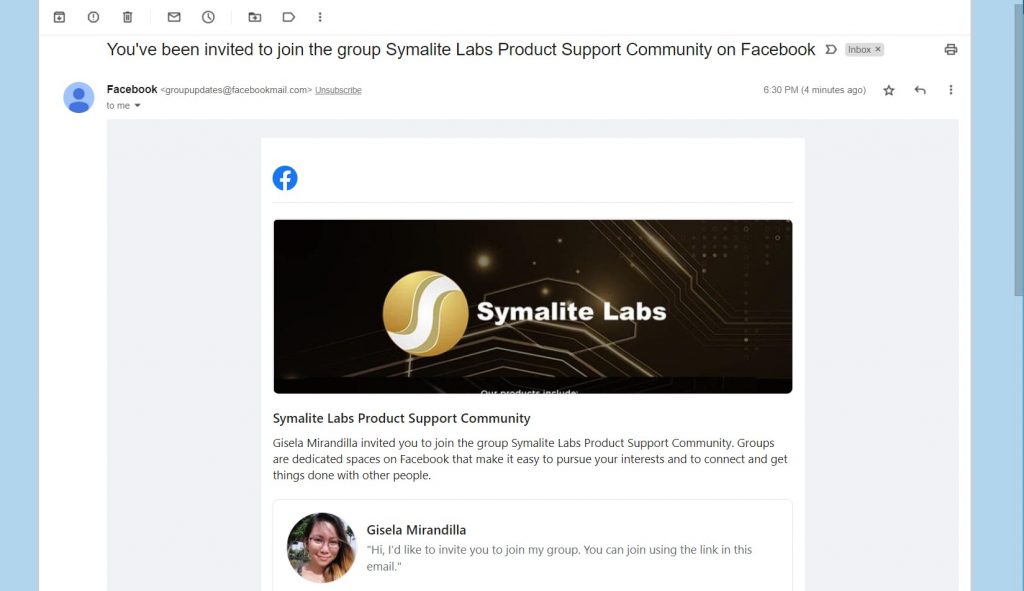
The email will have to include the group link so that the person can confirm that they want to join, and they will be automatically approved (they will have to be approved by the group admin in a private hidden group). The link lasts for 28 days and is only available to the person who received it. Follow the below steps to invite by email.
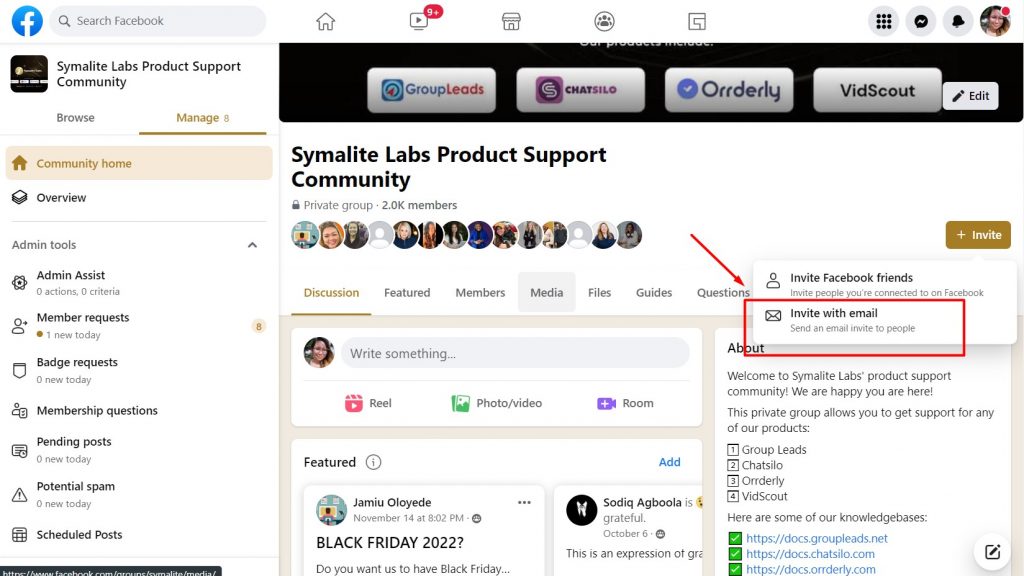
1. Open Facebook and go to your group.
2. Click +Invite below the group name, then select invite with email.
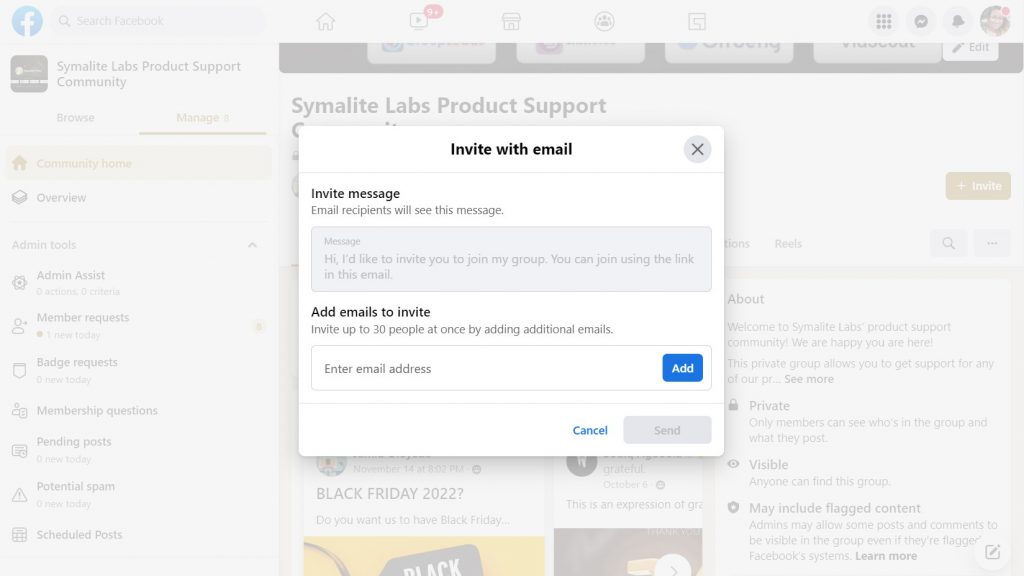
3. Add the email addresses and tap Send. It will be delivered right away.
Invite with Link
This is only available for private hidden groups. Both admin and members can invite new members through a link with the admins’ approval. You can share the link on or outside the Facebook platform.
The person you shared the link with will request to join by clicking on the link. He will then be approved by a group admin to become a member. The link expires after 48 hours, or after 20 people have clicked on it, you can create a new link for more people to join.
Invite people by sending a link with the following steps:
1. Go to your group on your Facebook app and tap Invite below the cover photo.
2. Tap Invite with Link and click on the link to copy it.
3. Share the link by tapping Share in Messenger or the More share option.
How to Decide on Whether You Should Accept or Decline a Request in Your Facebook Group
There are certain things you should consider when accepting or declining a request in your group. As an admin, you should set questions, criteria, or rules that will enable you to choose eligible members.
Members that do not answer the questions, follow the rules, or meet the criteria should not be considered members – they should therefore be declined. Only the members that meet your group requirements should be accepted.
Some people are requesting to join your group so that they can spy on you, and they could be working with your competitors. While some members have questionable profiles, they may be using newly made accounts or use stock photos for their profile pictures. It is advisable not to accept these types of members.
How to Accept or Decline a Request in Your Facebook Group
There are different ways to accept or decline members’ requests, but using Group Leads is the best way.
Group Leads enables you to accept or decline requests more efficiently by automatically copying answers to membership questions into a Google Sheet. It also allows you to turn your new Facebook group members into leads in Google Sheets and email subscribers.
To approve new members’ requests and turn them into leads, go to your Facebook group and set up the three questions you want new members to answer when they join. Make sure the question includes a request for an email address.
Install the Group Leads chrome extension, connect a copy of the provided google sheet format and hook it up to your email marketing software. Then go over to new members’ requests, select your filters, and hit approve all button.
All information will be added to your Google Sheets and email list with just a click. You can log on to your Group leads account dashboard to find all your new Facebook group members’ data. The data can be filtered and exported.
Another remarkable feature is you don’t need to manually click before you can approve new members into your group. This is because Group leads help you to auto-approve member requests.
And at the same time, it enables you to send members’ data to Google Sheets and your email marketing software. Without approving or declining members,
Group Leads enables you to message new members who have not completed the membership question.
Group Leads also allows you to decline new members’ requests automatically. It helps to identify spammers that join your group with different accounts and automatically decline their requests.
In addition, when you decline new members, Group leads enable you to automatically send a custom message to the members to notify them. Follow the below steps to auto-message dropped members.
1. First, make sure you have Group Leads Chrome extension installed. Open the Group Leads extension on your Facebook group.
2. Click on the setting tool to see “Enable decline messaging” among the displayed options. Toggle the button in front of it and click on “Update.”
3. Click on “Custom decline message” to compose the message you want to send. There are three options above, where you can set your preferences of how you want the message to be sent.
4. Compose the message stating why you declined the request. Include the group URL for them to join again and do the necessary thing before approval.
5. Click on “Update” when you are done. You will then be able to automatically send a message when you decline a member request.
Can Someone See if You Decline Them on Your Facebook Group?
You may be wondering if the people you declined are notified. The answer is YES and NO. It is a YES because if you decline the member request with feedback, the person will be notified that their request has been declined.
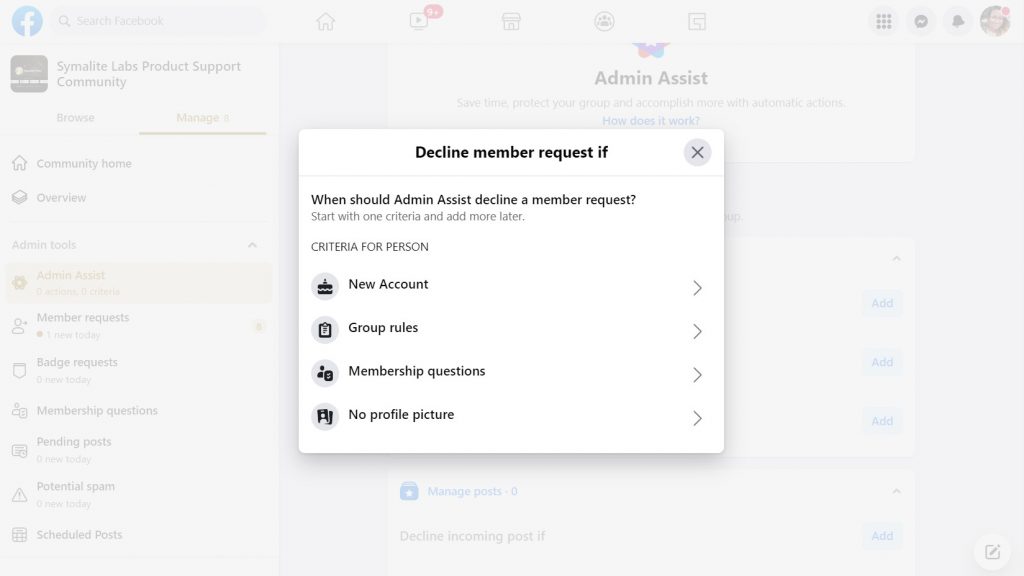
It is also a YES if you have set up Admin Assist to automatically decline member requests and you have set up a feedback message.
But without the feedback and it was manually declined, the answer is NO.
Final Thoughts
Managing Members’ requests is one of the many things you should do as an admin to ensure your group is safe and healthy. Going through all of your new members’ requests to approve or reject them can be tiring and time-consuming.
Group Leads have made things easier for you by making automatic approval and decline possible. It enables you to turn new members into prospective leads and helps you collect necessary members’ data.
Group Leads allows you to automatically send messages to the members you declined. You can choose to notify the members you declined or not; that is left to you. The members you notified will know you declined them, while the ones you declined manually without feedback will not.

