Some tasks are simple to begin but challenging to complete. Many users build communities and business pages on Facebook like it’s nothing. Their search results start to read; How to delete a Facebook Group. This is usually after an endless search of the ‘Delete Group’ button on Facebook feeds.
However, being a part of a Facebook community is beneficial, but it’s also crucial to know how to delete a Facebook group if the need arises.
In this article, we will navigate you through how to delete a Facebook Group effortlessly. And also share some of the solutions our top product, Group Leads, provides by helping you turn new Facebook group members into paying customers. Without further Ado, let’s get started.
Ways of Deleting a Facebook Group
When you are faced with the situation of how to delete a Facebook Group, do not freight because it is not an impossible task. There are two methods you can easily get this done.
Get Rid of The Group Completely
This option allows you to manually remove everyone that belongs to a Facebook group, provided you are the group admin.
Sorry to burst your bubble, but there is no shortcut to this method.
You have to go through the process of removing each member till you are the only member left then, you can exit and delete the group. Once you click the confirm button to approve your actions, the group will be deleted from your Facebook Records.
Ensure you inform your group members before taking these actions. We have another write-up here about how to delete Facebook group members more efficiently.
Pause The Group (A Reversible Method)
Other than deleting a Facebook group completely, pausing the group is a more flexible option that allows you to conclude your decision to either delete the group or not. Group members’ actions are retained.
However, their activities would be restricted. And you can always reactivate your Facebook group at will.
After all, a thriving Facebook group can be of great advantage to your company. So the longest sabbatical will only be of value to you in the future.
Step by Step of How to Delete a Facebook Group
We would be looking at the Desktop browser and mobile app for a step-by-step guide on; how to delete a Facebook group.
How to Delete a Facebook Group on a Desktop Browser
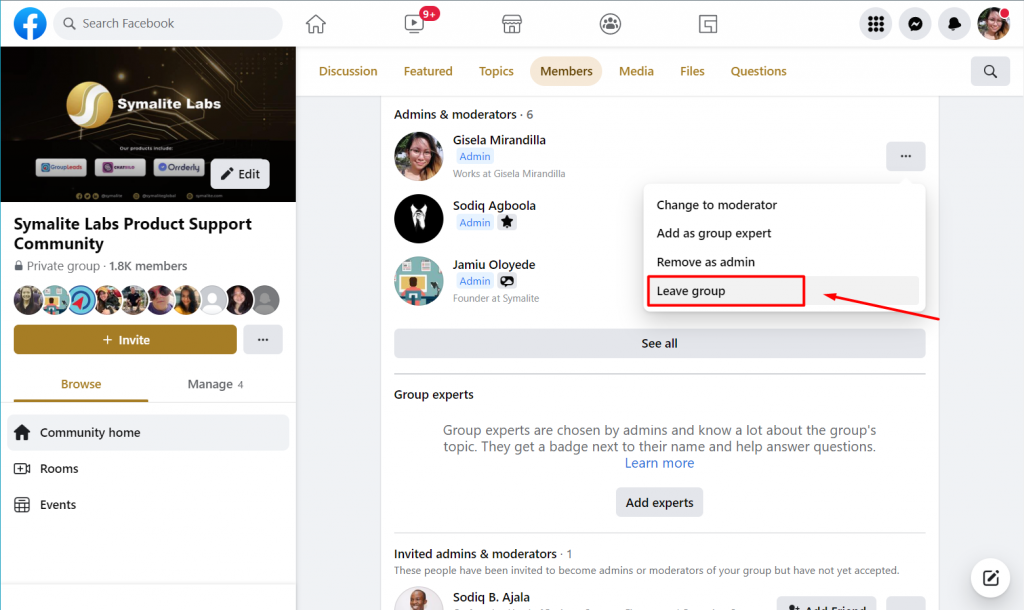
Select “Groups” from the menu on the left, then click “members.” Each group member must be dismissed by clicking “remove member” after selecting the three dots next to their name.
You must leave the group for it to be deleted once all of the group’s members have been eliminated.
How to Delete a Facebook Group on the Mobile App
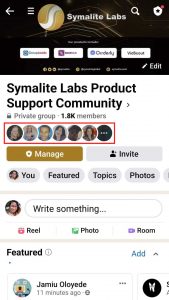
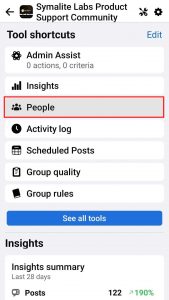
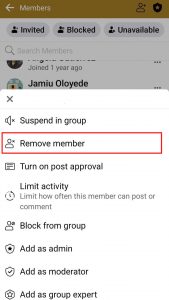
On an iPhone or an Android device, open the Facebook app and select the group you want to eliminate by tapping groups. Head over to the members’ list by clicking on the profile pictures below the group name, or by selecting “People” on the Admin Tools menu.
By tapping the three dots next to each group member’s name and choosing “Remove member,” you must eliminate them all.
Once everyone has been kicked out, click the three dots next to your name to exit the group. This will deactivate the group.
Final Thoughts
People decide they want to delete their Facebook groups for many reasons, one of which may be when they are not getting the desired results from those Facebook groups.
If you need help collecting leads from your Facebook group members, check out Group Leads. This tool will help you create a sales funnel to easily turn new group members into buying and paying clients. This product is very easy to set up and navigate.
The way it works is that it helps you collect your customer’s email address plus other important personal details, and they will be automatically added to your email nurture sequence.
This app is the game changer that would prevent you from searching for; how to delete a Facebook group here and there on Google again. Click here to get a free trial today.

