
In this post, you are going to learn how to create a Facebook Group.
If you use Facebook, you may be part of any group. You might have thought of the potential of starting your own Facebook group because of one reason or the other, but you want to know the exact steps involved.
Today, I am going to show you the 7 easy steps to creating a profitable Facebook group.
Need to Know – What is a Facebook Group?
Before everything, it is good to know what is a Facebook group.
Facebook groups are communities created to connect a group of like-minded people who share stories, advice e.t.c. around a common topic.
Facebook groups are great for building customer relationships and interacting with target audience.
Some Reasons why Facebook Groups are beneficial for Business
Building a Facebook group for business is great for engagement, referral traffic, and sales. The entrepreneurs should consider creating a group because, unlike the Facebook pages, consumers prefer to join the conversation in a group instead of a page post.
More engagement with the person instead of a company is beneficial for business. By creating a niche Facebook group, receiving feedback from the members of the group will be really valuable.
Creating a group is an easy process, to manage it is a lot of work but it can help you build your community or target audience without spending anything on advertising.
How to Create a Facebook Group in 2023 (7 Steps ONLY)
You can now learn to create your own Facebook group with these 7 easy steps:
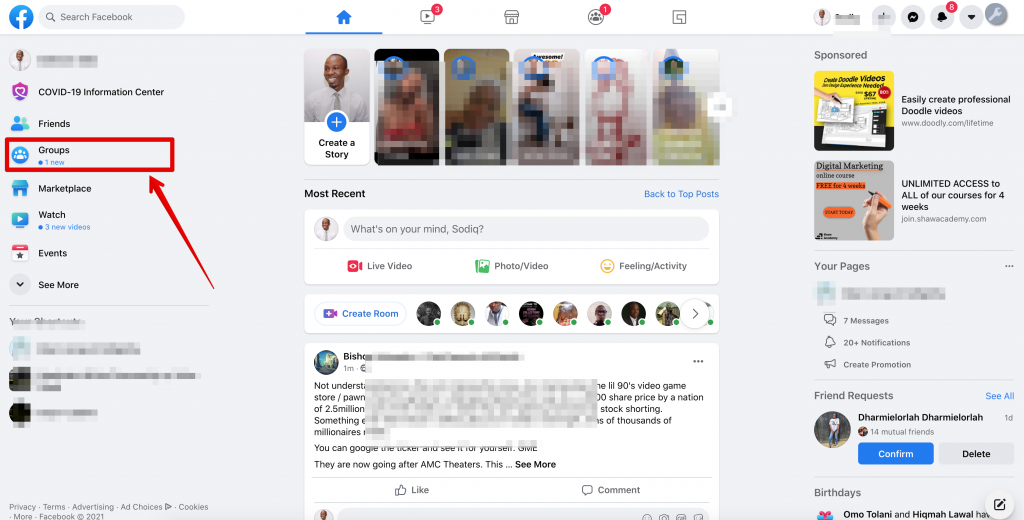
1. Find the “Groups” Button under explore at Left Sidebar on Facebook
When logged into Facebook, go to your homepage, navigate to the “Groups” under explore on the left sidebar and click on groups button (image below) and move to the second step.
Once you complete the first step, the page will look like the image below. The page will appear with all of your Facebook group information as groups suggested for you, your friends’ groups, popular groups near you, and pending group invitations.
You need to ignore all those stuff and continue the process. Tap “Create New Group” button on the top left side menu.

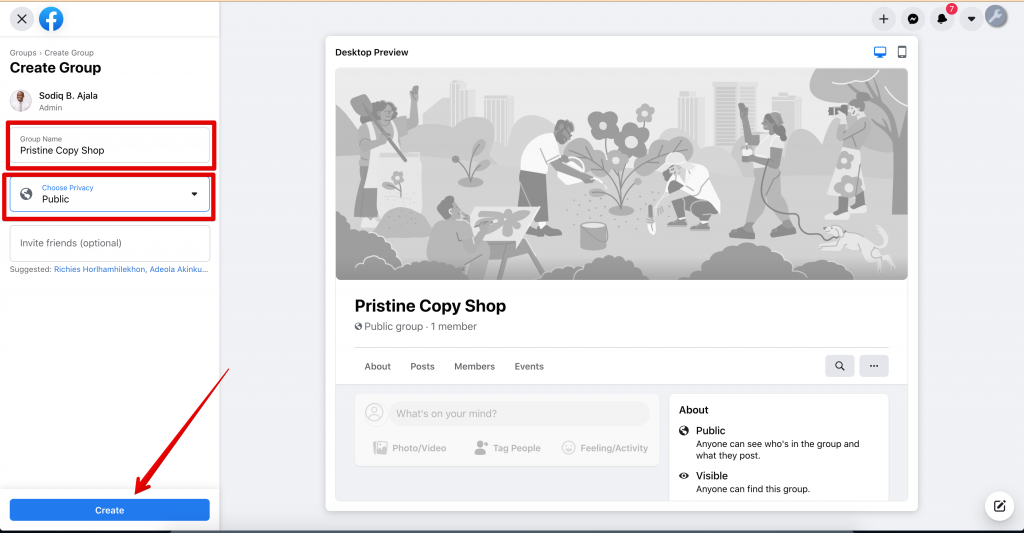
3. Choose your group name and settings
The most important step is to fill out the information in the popup. Choose the perfect name for your Facebook group. Such a name, that will attract the members. The group name should be attractive, short, direct, compelling, and don’t forget it has to contain your keyword.
I use the Keyword Surfer extension to know the search volume, and it’s free.
In the next section, write the names or emails of those, you want to invite to your group. When you are inviting them, you should write a short note about the purpose of the group and inform them why they should join the group.
Finally, you should choose your group privacy setting. If you want to attract leads quickly, you should choose the “Public” setting. You will have to choose the best option by keeping in mind the main purpose of your Facebook group.
If your group is only for customers and you want to post sensitive information, choose the option “Private”. By selecting this option, anyone can find your group but only the members can see the posts.
Then click on Create.
Now, your Facebook group is set up.You still need to focus on a few things.
4. Add a Facebook Group Cover Photo
The fourth step is to add a cover photo to your Facebook group. The ideal size of the image is 820px wide by 462px tall.
Your Facebook group photo should contain the name and every other detail of the group as well as other call to action you want members to take.
You can use a template from Canva or hire a professional graphic designer on Fiverr for just $5 to get it done for you.
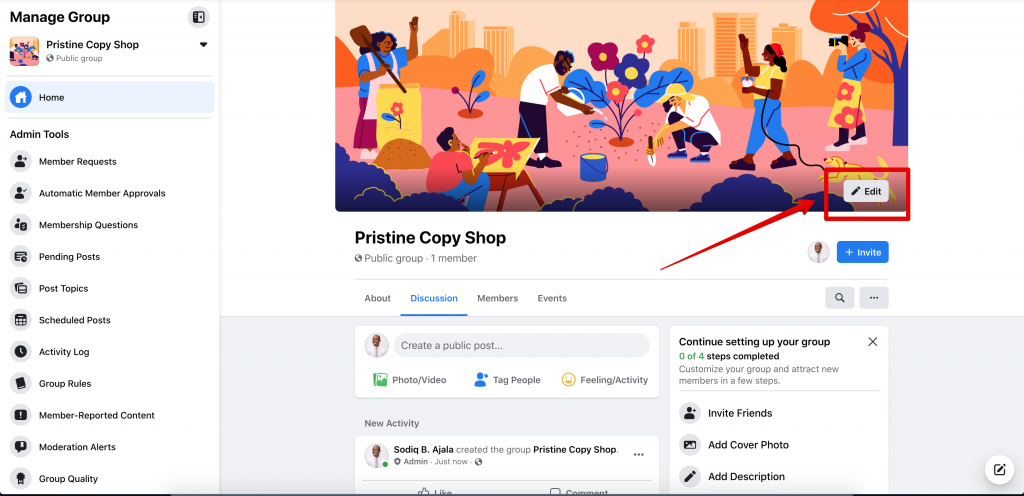
5. Edit Group Setting
Editing your Facebook group setting is crucial to assure that your group will be formed according to the way you want and convey the aim of your group to the public. In order to do this, please navigate to the three dots button “More” below the cover photo of the group.
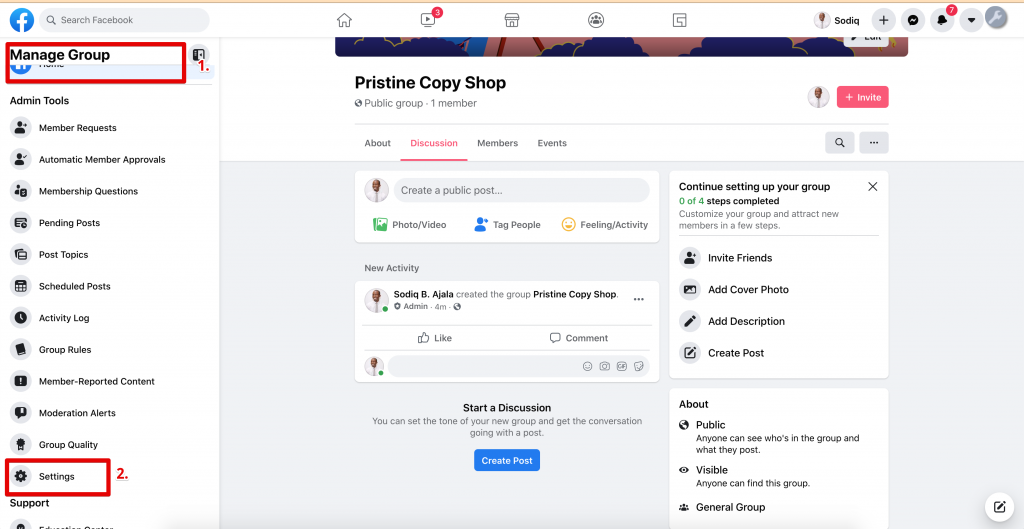
When you click on “Edit Group Setting“, this page (below image) will appear. Fill out all the options to further customize your group.
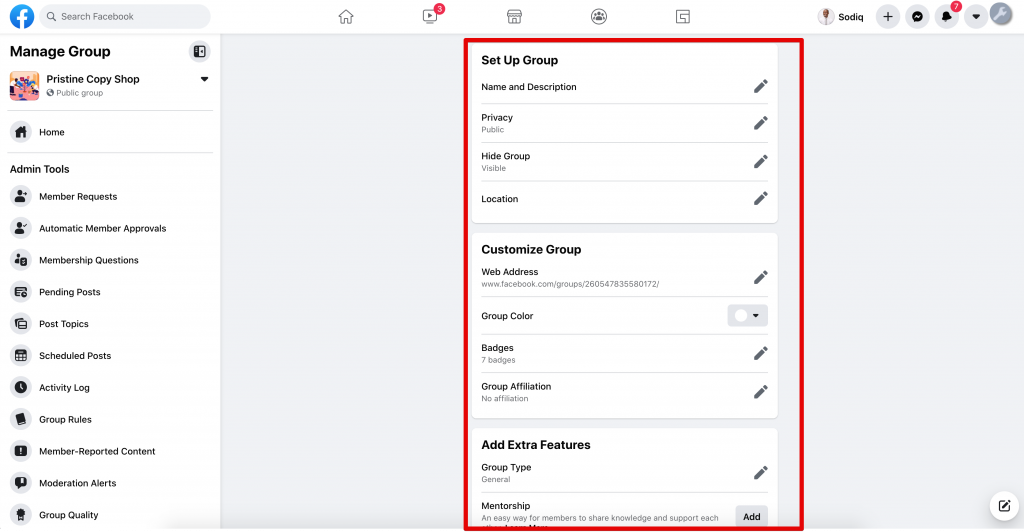
The first section is to select the group type, so people can understand what the group is about. Buy and Sell, Events and Plans, Neighbors Parents, Family, Project, Travel, Study Group, and General group are some of the group types you can choose.
Write the description of the group in particular. The description can be of 3000 characters. You can use emojis to make your description more appealing.
Add location if you have a local group. This can help people to easily find your group when researching on the groups in their area.
You can add up to 5 tags. People can find your group with the keywords. For example, if they type “content writers” in search, all the groups with content writer tags will appear.
There is also an option to customize the URL. By customizing your group URL, you can easily share it with anyone.
You can also add pending member questions into your Facebook group. You can ask some questions to know more about people who want to join your group.
In the “Edit group Setting” option, there is a section for membership request, click on “Ask questions“. You can choose the question type, written answer, multiple-choice or check-boxes. Add the questions and click save.
You can ask different questions including email addresses to convert the new group members into leads. Extract the answers and data by using Group Leads chrome extension to add new group members into the google spreadsheet or add their emails to your favourite email marketing software.
This chrome extension helps you to build an email list from the Facebook group. You can make more money from your Facebook group with the help of Group Leads.
6. Promote & grow your Facebook Group
Now that you’ve created your new Facebook group, you need to increase its visibility.
Basically, you can start talking about it on your Facebook timeline, in other groups, or on your story. You can as well send invites to your friends so that they can also join your community.
Here is a step-by-step case study that shows you how a newbie grew his Facebook group from 0 to 300,000 members in just six month. Now is the perfect time for you to start yours.
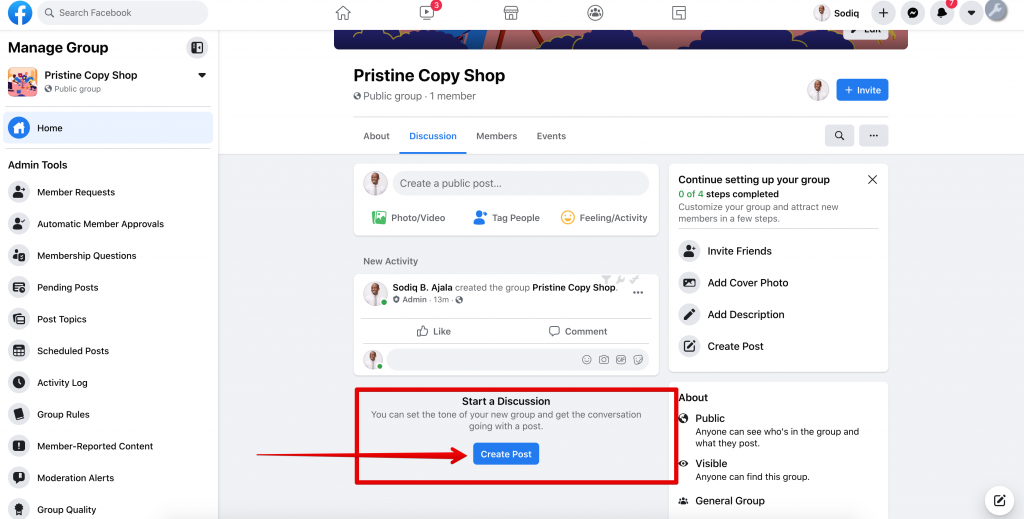
7. Create your first post
The last step is more exciting. You can create your first post to engage the people that joined your community. Your first post should be more appealing. You can tag friends, ask your group audience for comments or their recommendations.
Final Thoughts
Now, I hope, after reading this post, you can successfully create a facebook group without any difficulty.
I’m excited to share this with you. If you find it useful, don’t forget to share it on your social channels.